To make a particular menu item link to a section on the same page in the Divi theme, you can use anchor links. Here’s how you can do it:
- Create the Section: First, you need to create the section on the same page that you want the menu item to link to. In the Divi Builder, add a new section to your page, and then add the desired module(s) within that section.
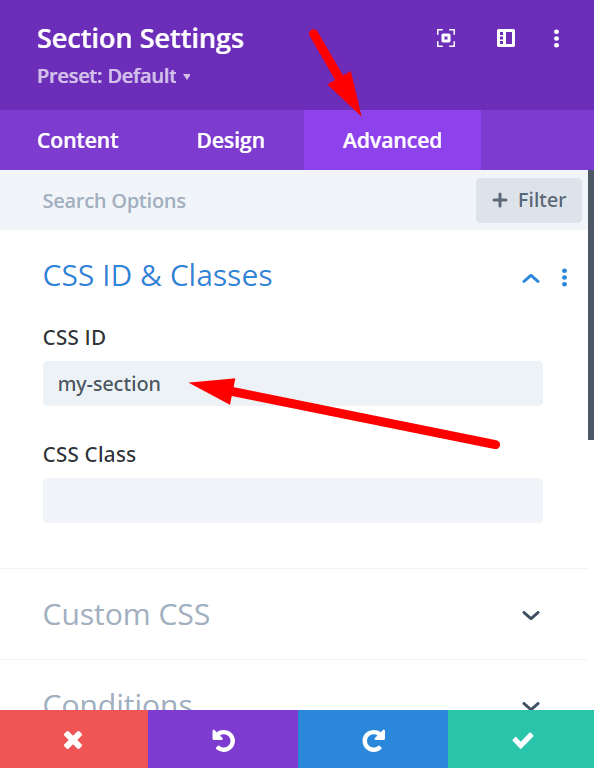
- Assign an ID to the Section: Once you have added your content to the section, you’ll need to assign an ID to the section. This ID will be used as an anchor link target. To assign an ID:a. Click on the section settings (gear icon) for the section you created.
b. In the “CSS ID & Classes” tab, enter a unique ID in the “CSS ID” field. For example, you can use “my-section.” - Create the Menu Item:a. Go to your WordPress dashboard.
b. Navigate to “Appearance” > “Menus.”
c. Select the menu where you want to add the link.
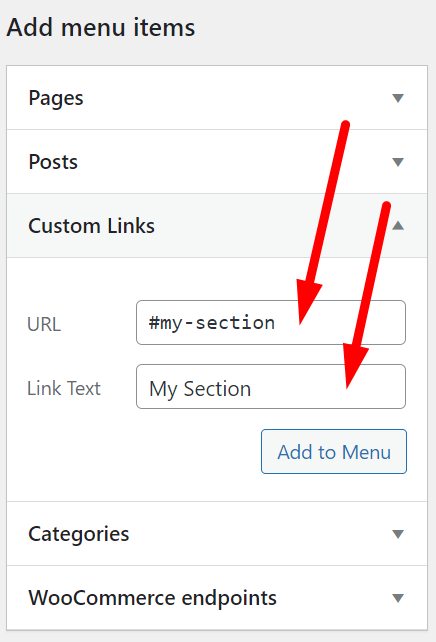
d. Click on the “Custom Links” tab.
e. In the “URL” field, enter a “#” followed by the ID of the section you created. For example, if the section ID is “my-section,” enter “#my-section” as the URL.
f. In the “Link Text” field, enter the text you want to display for the menu item.
g. Click the “Add to Menu” button. - Arrange Menu Items: Drag and drop the newly added custom link menu item to the desired position in your menu. You can also create sub-menu items if needed.
- Save Menu: Once you have arranged the menu items, click the “Save Menu” button to save your changes.
- Test the Link: Visit your website’s front-end and navigate to the page where you made these changes. Click on the menu item you created, and it should scroll smoothly to the section you specified.
Remember that anchor links rely on the section’s unique ID to work correctly. Make sure you use the correct ID in the URL and that there are no typos or spaces. Additionally, Divi’s behavior might change based on the version you’re using, so these instructions should generally apply, but there could be minor differences.
Visited 1 times, 1 visit(s) today


